Email Receipt Forwarding
Last updated 4 months ago
How Email Receipt Forwarding Works
Using the email linked to your Easy Expense account, send or forward emails to: upload@easy-expense.com
Note: This feature is strictly for processing expenses and does not support income transactions.
To forward receipts from a different email, contact support@easy-expense.com to set up an email receipt forwarding alias.
To check the email linked to your Easy Expense account, tap the gear icon (top left) ➜ tap "Account". Your email will be under your account name.
Emailed receipts are uploaded to the “Transactions” tab under “New Transactions” after it finishes processing. You'll receive a success or fail email in response.
Emailing multiple PDF files through a single email will create a single expense with all the attached PDFs.
We currently support emails with:
PDF file(s)
Text and images inside the email (attached or in the email body)
Forwarding Email Receipts
Forwarding Email Receipts
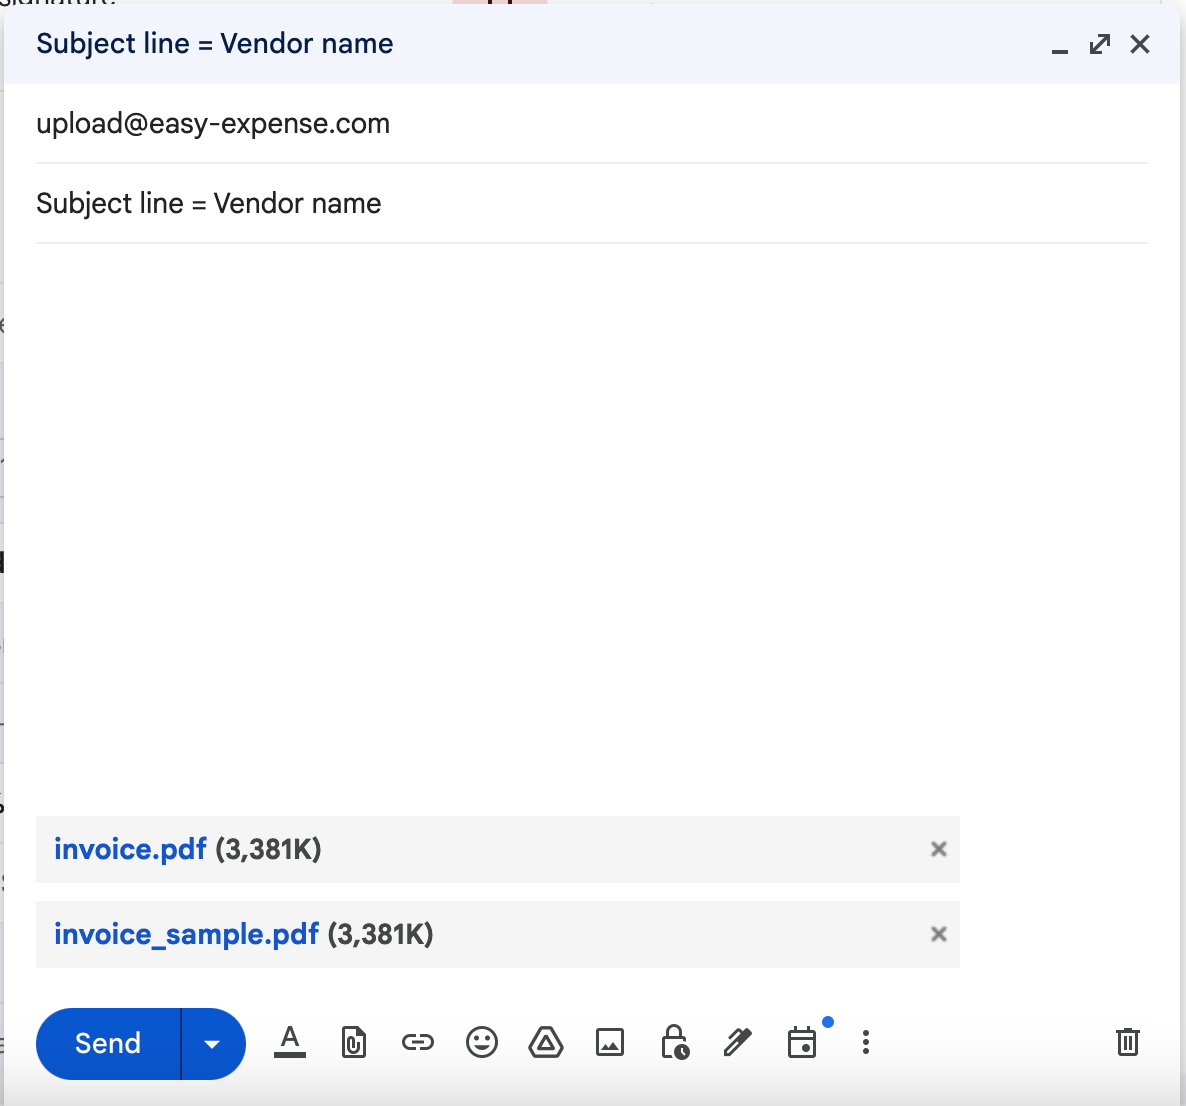
Forward an email or email your PDF file(s) to upload@easy-expense.com (must be from your Easy Expense email). The subject line will be the vendor name.
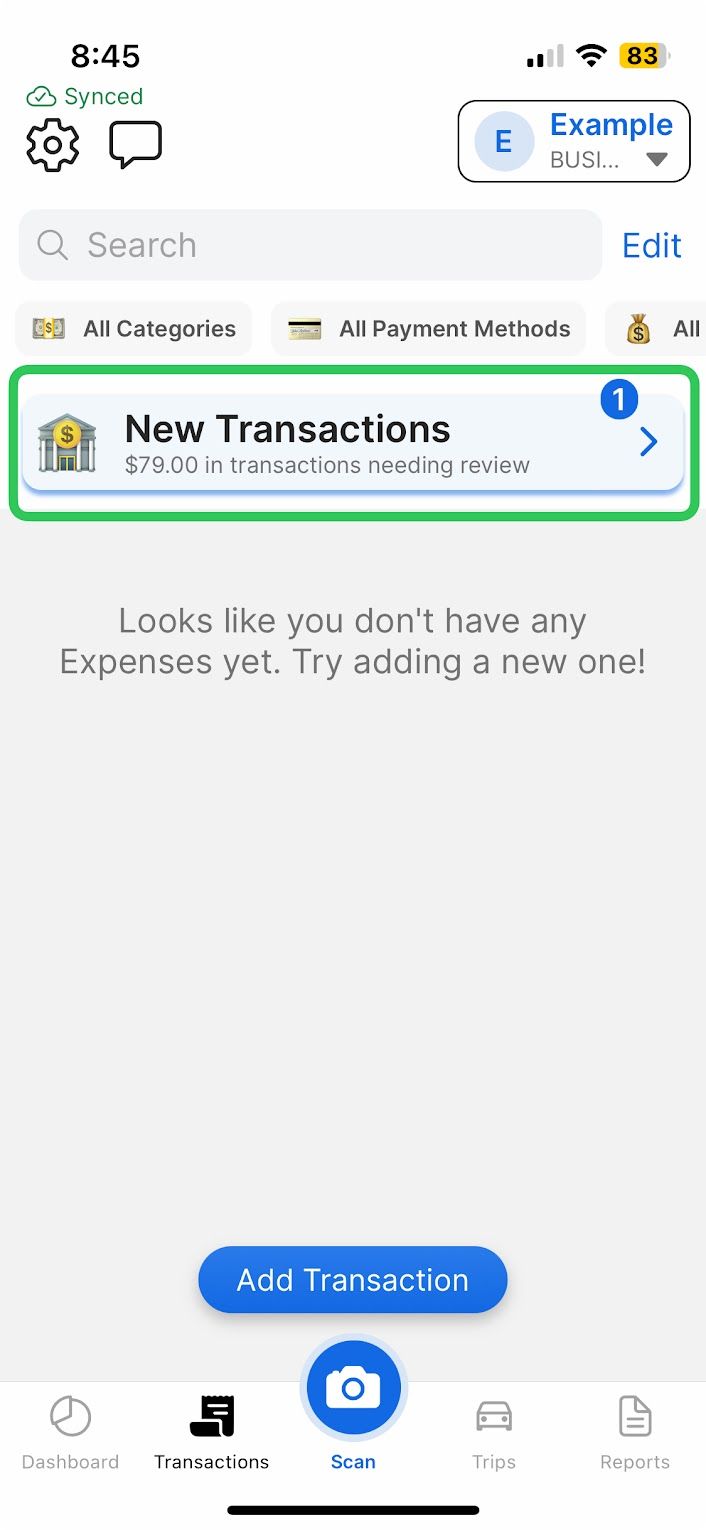
Tap the Transactions Review section (via the "Transactions" or "Dashboard" tab).
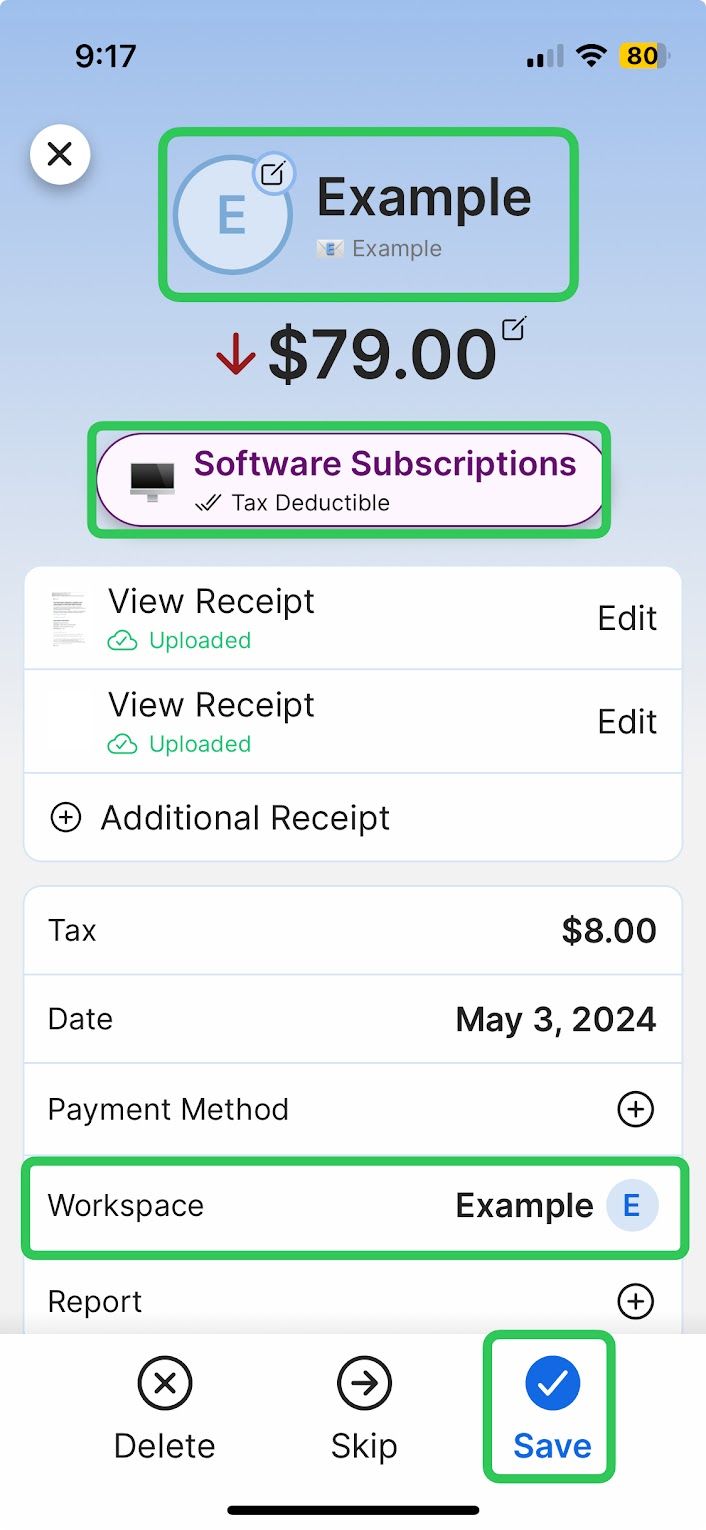
While reviewing the transaction, you can tap any field to edit. Some commonly edited fields are highlighted in the above photo (vendor name, category, and workspace)
Tap "Save" when done editing
Editing Transactions
Editing Transactions
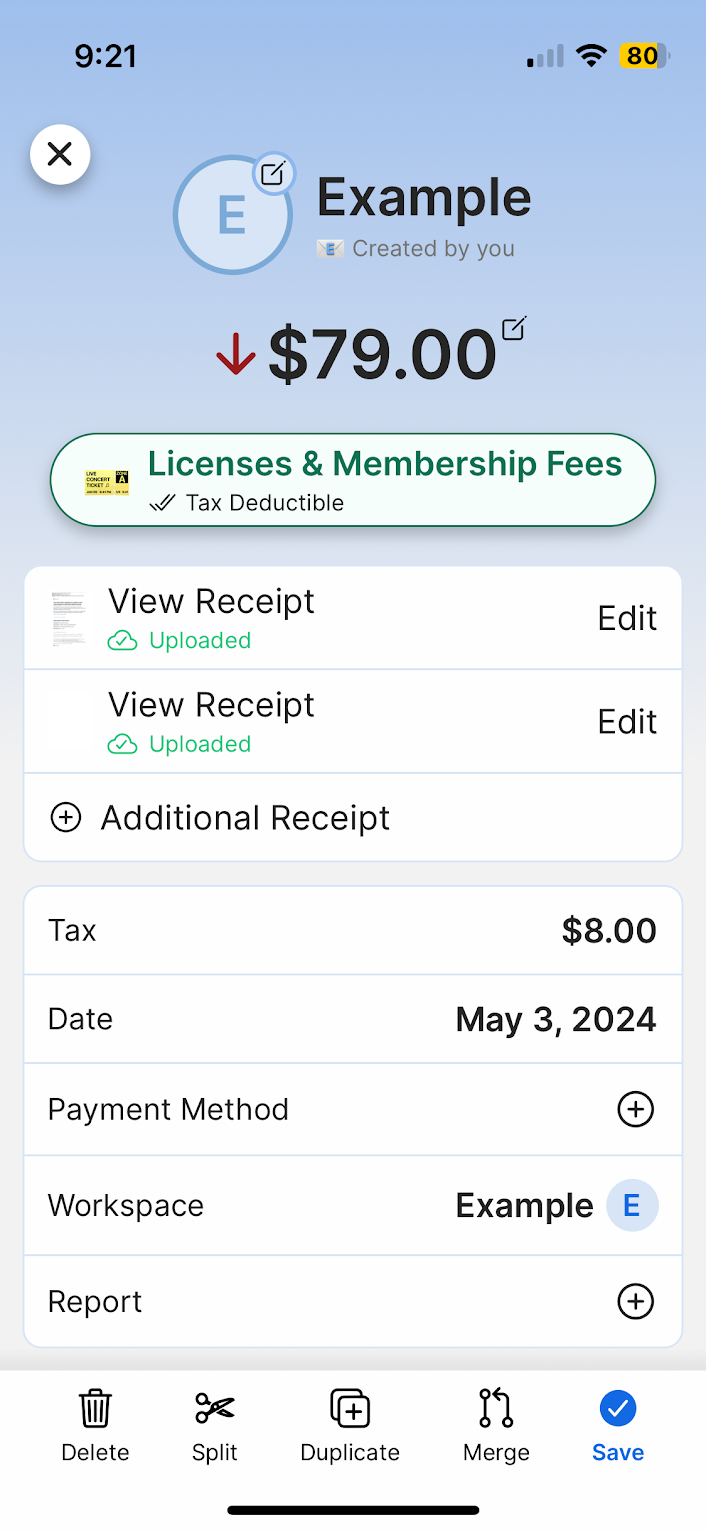
After saving your forwarded receipt, you can edit it at any time to review or change any details.
To Edit Transactions:
1. Tap the transaction
2. Tap any field you want to edit
3. Make the desired change
4. Tap "Save"
Was this helpful?
Still need help? Share an idea